
How To Record Videos for Our Church Broadcasts
Okay, this will be a pretty straightforward guide to how to record videos for our online services. We’ll cover a number of different areas here: music, preaching, hosting, children’s moments, but the early part of this should be applicable to everyone recording anything.
Where To Send The Files
Well, this is the most important part. You want to upload your files onto the DropBox folder we made for this. The link for that is here.
Depending what computer you have, the easiest way to get the video from your phone to the DropBox is to AirDrop it to your computer, then upload it from your computer to DropBox.
You can also upload it straight from your phone, using the DropBox app! It takes a little longer as a process, but it works just as well.
Everything Else
There is a lot know about shooting video, but everything boils down to three main things. And as long as you have the three main things basically handled, you’re okay. Those things are:
Audio
Video
Lighting
We’ll go through each one of those things, bit by bit.
If any of this starts to seem overwhelming, just remember there are 14-year-olds with YouTube channels recording entirely in their bedrooms who have mastered this and are now millionaires. This isn’t as hard as it seems. You can do this.
Let’s start with audio:
Audio
This is on the list first because it is the most important thing. Nothing matters more than audio. People will look at video that are shot poorly and lit terribly, but they will not watch a video with bad audio. So, let’s figure out how to make your audio sound as good as it can.
To start with, you already intrinsically know a lot about how to do this well, because you have made phone calls before. All the things that you do when you get a phone call and you’re trying to make sure the other person can hear you and you can hear them – “it’s loud in here, let me move to a quiet space” “can you hear my kids in the background? Is that coming through?” – that’s the same way you should think with regards to recording audio.
So let’s go through the variables.
1. Find A Quiet Room
This is pretty obvious – you want a room where there aren’t other people in it, you want a room where you can’t hear the TV or the refrigerator or the air conditioner or whatever object makes noise in your house. Ideally, this room has carpet, and furniture that will absorb sound. You may only have one place in the house that works, or you may have multiple options in your house or apartment that would be okay. When we get to video, we’ll talk about what’s the best place to film visually. But more important is what’s the best place to film acoustically. What’s going to give you clear, non-echoing sound? Go there.
2. Make That Room Quieter
If you’ve ever seen a photo of a recording studio, one of things you notice is that there’s an odd foam pattern covering all of the walls.
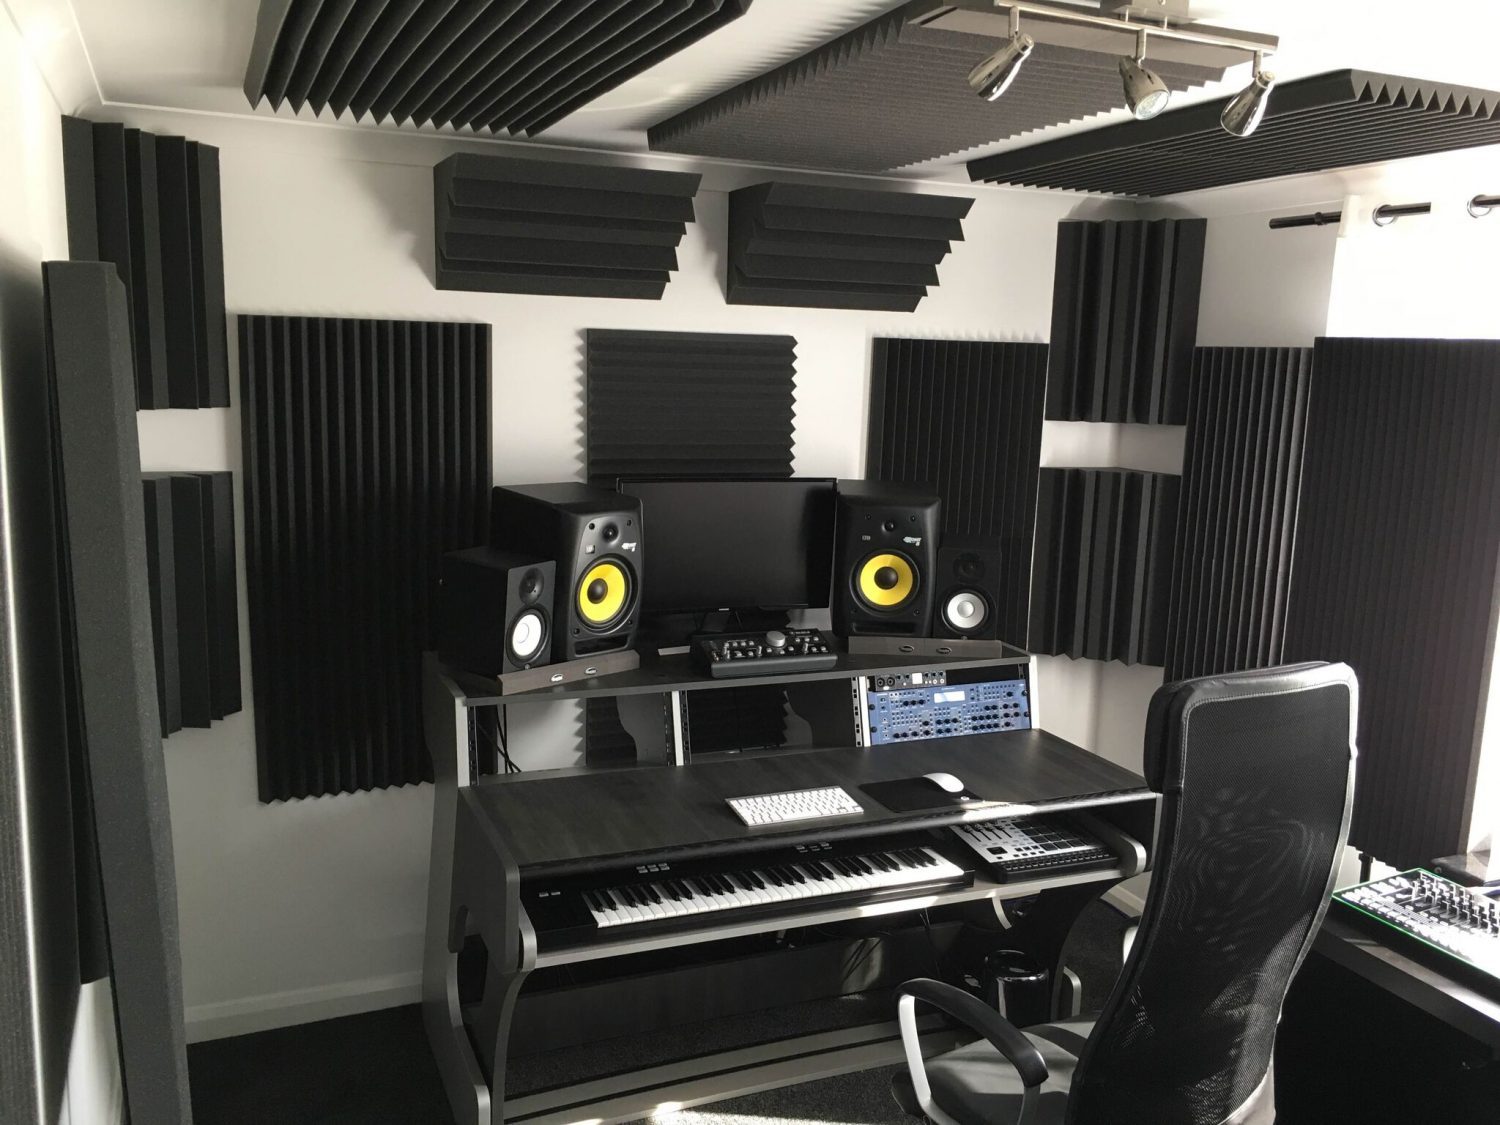
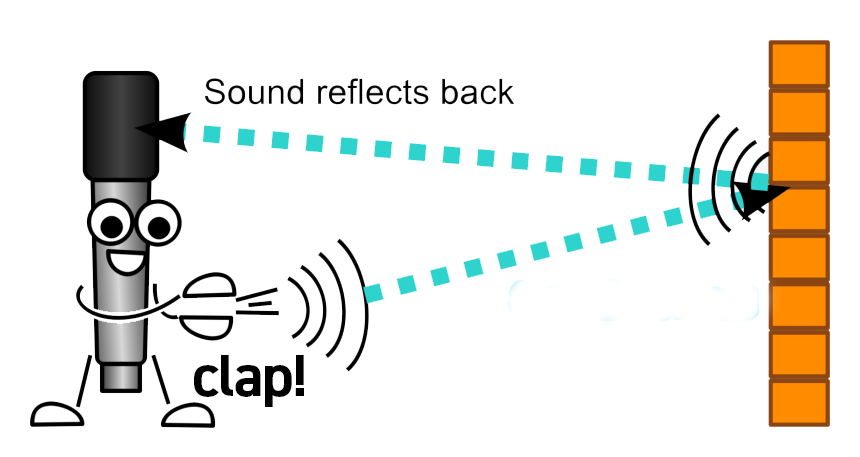
These panels are made to absorb and disperse sound, so that any noise you make is perfectly clear. They’re made of foam to absorb sound, but you’ll also note that they’re in funny shapes. Why? Without getting too much into the weeds of it all, as you might remember for science class, sound is a wave. If you direct sound at a flat wall, that sound will bounce back and hit your microphone, and you get an echo.
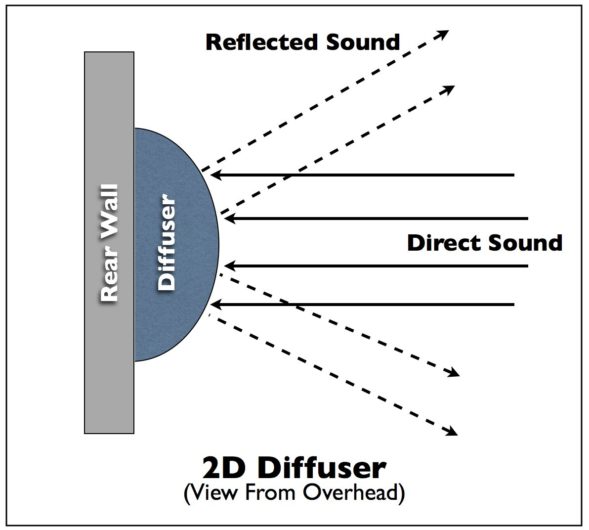
If you have something that absorbs the sound, less of the soundwave comes back into the microphone. And if you have something that diffuses the sound, even less sound than that will come back. That’s what those fancy and surprisingly expensive foam panels do.
Since you can’t do that, what can you do? There’s a couple things that you can try to do.
A. Pay attention to what you’re talking towards. If there’s a flat wall right in front of you, the sound will bound right back.

So if you can move further away from a wall, or angle yourself so that you aren’t facing directly towards the wall, both those things will make a difference.

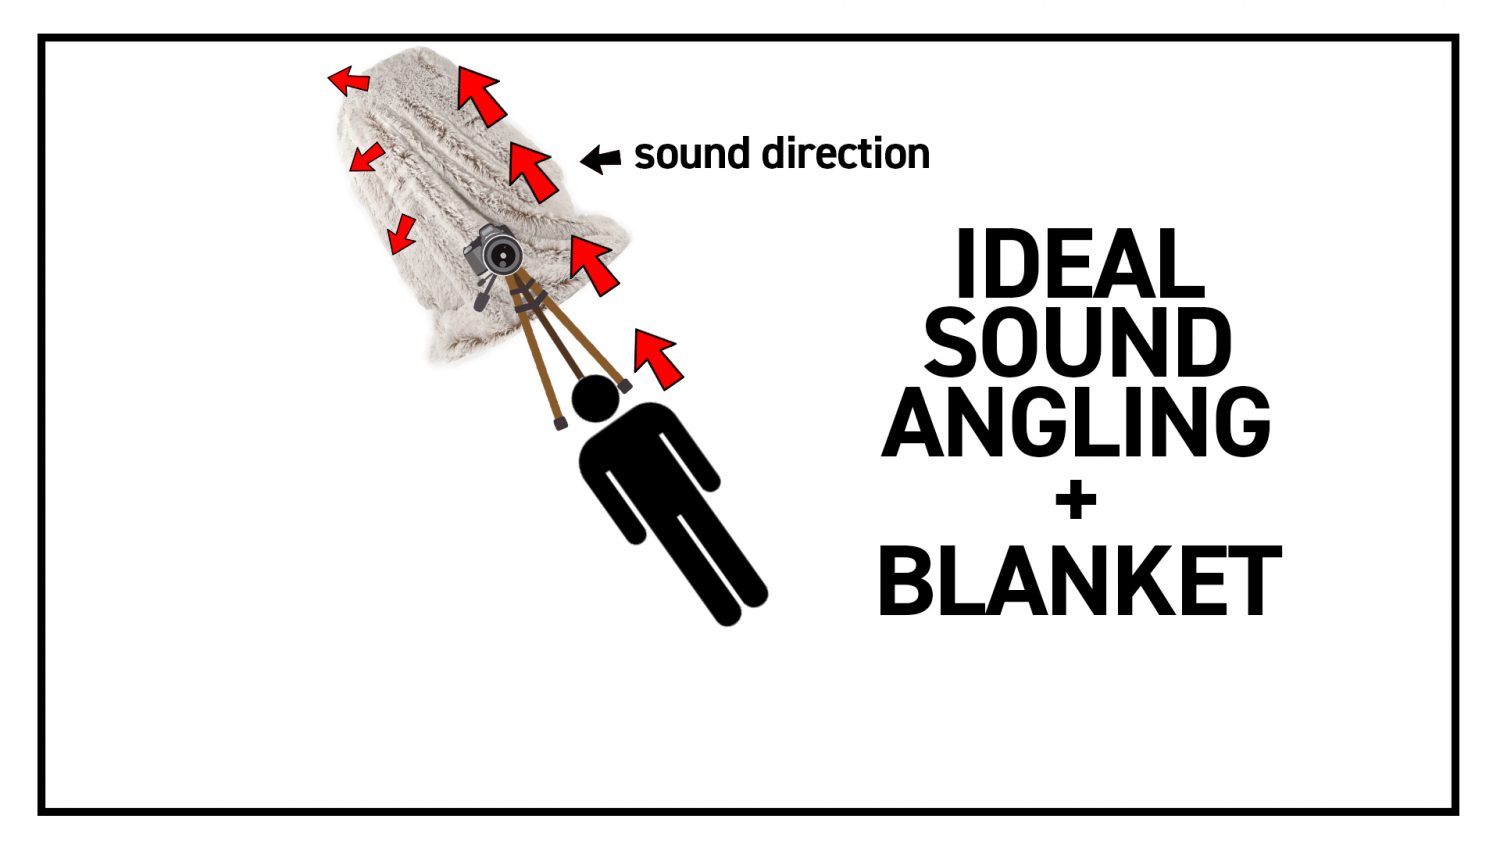
B. Soften the area behind the camera. It’s something you don’t normally think about, but if you tack up a blanket behind the camera, it’s not visible in the recording, but it’s going to make a lot of difference in how the recording sounds.
Okay, now that we’ve handled those two major variables, let’s go to the biggest item necessary in regards to audio:
Microphone
Here’s the thing about microphones when it comes to video – you don’t really need to have an expensive one. We bought a lot of lavalier microphones or Blue Yeti microphones for people before this started, and we can try and get more. Those aren’t expensive mics. The key is being close enough to the microphone that it can pick you up clearly.
The microphone on your phone is actually pretty good! It is, after all, a phone, meant for recording voices. The word “telephone” even means “carries sound.” But the problem is that if you’re close enough to be able to use the microphone in a way that sounds nice, you’re too close to the camera to really film it.
However, you have a microphone! Everyone who has been assigned to video so far has been sent a microphone, and we can keep sending out microphones to different people as this goes along.
So, the easiest solution is to connect your microphone to your phone and film things that way.
Pretty straightforward. But, what if you are too far away from your microphone for your cable to reach? Or, what if you can reach, but it makes the microphone cable really obvious?
Well, here’s the thing: all of these videos are being recorded rather than live-streamed. So you’re able to record the video in one place, and the audio in another. So you can have your microphone running to your phone, or computer, or iPad, and record the audio there, and record the video on your phone or camera. You send both to Communications, Communications puts the two things together, piece of cake.
Recording audio to your phone or computer is easy. If you have an iPhone, it has a program on it called “Voice Memos” (it is pre-installed and it can’t be deleted), which you can record right to. On a Mac computer, you can record audio into a number of programs already on your computer, including Quicktime. A PC should have a program called Sound Recorder. Or, no matter what you’re hooking your microphone up to, if it has an internet connection, you can record the audio on a website like Online Voice Recorder.
So, if you are hypothetically hosting the service, you could be sitting comfortably behind a table, with your Blue Yeti mic in front of you and the cable running off and recording onto your laptop or phone. Or if you’re preaching, you could be sitting on a stool, wearing a lav mic, the cord hidden in your shirt so it’s not visible to the cameras.
Okay, that’s enough on audio. If you have more questions, you can send them to me. Let’s move on to video.
Video
This section is going to be shorter than you think.
Unless you have a DSLR camera for shooting video, you are going to use your phone to record this video. It has a better camera than your computer (by a lot), it has a better camera than an iPad or tablet (unless you have a very old phone and a very new tablet), and it is good at recording video! Go ahead and use your phone.
But first, your phone has two cameras: one facing away from you (for photographing things) and one facing towards you (for selfies and Facetime). The quality difference between these cameras is vast.
It is tempting, when videoing something, to face the camera towards you so that you can see yourself when you are shooting your video. And, that may be the best choice for you! It may be that you discover you can only record a video when you can look at yourself on the screen as you do it. It may be that it is too difficult to record a video by yourself when you are propping your phone up and walking back and forth to make sure you are correctly in frame. If that is the case, then go ahead and turn your phone around and record it that way. It’s better to have a little less video quality than to have your head halfway out of the frame.
BUT, if you can, record using the good camera on the other side of the phone. You will get the best results by far that way.
BEFORE YOU RECORD: Make sure you have space on your phone. If you are doing a longer video and your phone is close to capacity, it can fill up the rest of your phone’s space. If you are close to capacity on your phone and aren’t sure what to do, delete some of the bigger apps (Facebook, Twitter, Instagram). They take up a lot of space on your phone, and once you’ve finished recording and uploading your video, you can just download the apps again
When recording your video you must – you must, you must, you MUST – record the video in landscape mode.
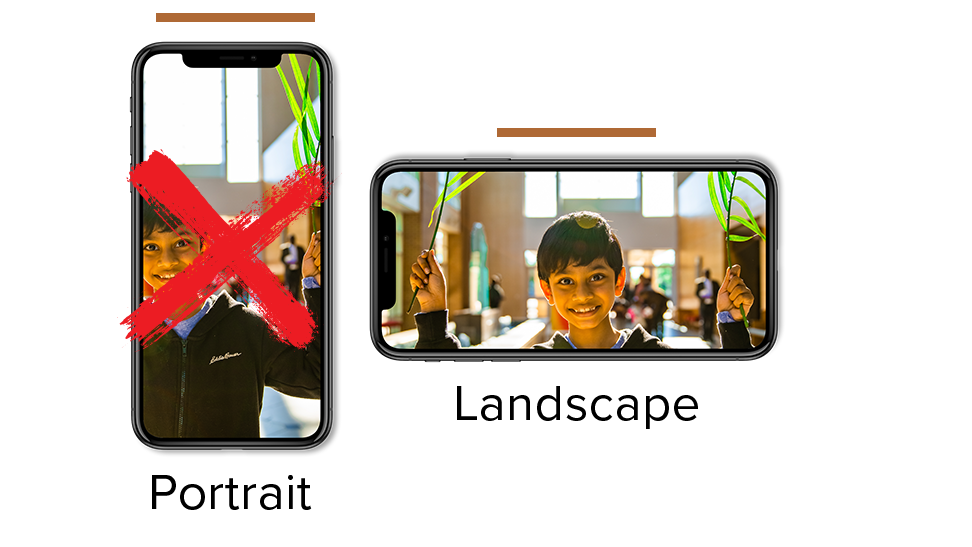
You should actually always be recording your videos in landscape mode. That means holding your phone sideways when you record, like so:
Landscape mode is better for making videos, it’s better for televisions, it’s better for laptops, it’s better for Facebook Live on the computer and the phone, it’s better for Twitter, it’s better for literally everything. The only apps you would want to have your phone the other way for are Snapchat and if are on Instagram Live. That’s it, that’s the whole list. So, turn your phone sideways.
Second, sit down. Ideally, find a stool or a low-backed chair, so that you can’t see the back of the chair as you’re filming. But sit down. Standing up in the middle of your dining room to do a video doesn’t look comfortable, and the longer you stand up, the weirder it feels. You can’t move around or talk to anyone or pick things up or lean on anything, you’re just standing stock still, looking at a camera. You wouldn’t do that in real life, so don’t do it here. Sit down. Be comfortable. You’ll make the viewer comfortable, too.
Now, if you’ve been on a Zoom call, you’ve looked at yourself on the screen and noticed that you seem much less attractive than you had thought. It’s not just you! It’s everyone. There is a reason for this.
One of these reasons is lighting, which we’ll get to, but the other one is angle. You are staring down into your computer as you talk. Your neck bunches up. Shadows form under your eyes. You’ve looked better.
This is a problem we can fix.
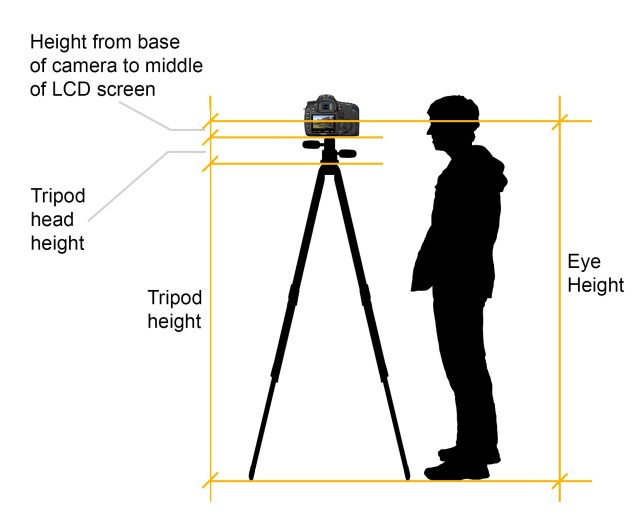
The basic rule on recording videos is that you want the camera to be about six inches above eye level. That way you tilt your head up slightly, your neck and face smooth out, light is able to reach your eyes, and you look your best.
Of course, the camera on the iPhone is a wide angle lens, and you may be placing it five to eight feet away from you in order to get the shot you want. At that distance, the math becomes a lot less important. You want it high enough that you aren’t looking down on it, but on a wide angle shot from a few feet away, usually lowering the camera down a little bit actually looks better than putting it up higher. If the camera is far enough away that it’s getting most of your torso, keep the camera at about chin height or a little lower, and you should be fine.
Now, what is in the background of your shot?
First off, if it needs to be nothing, then have it be nothing. Sometimes that’s a lot better than filming something with a distracting background, or bright windows in the background that make your camera iris down to adjust until it’s so dark you can’t see your face. A lot of people have spent years filming up against a blank wall and it’s worked out fine. So don’t worry if that’s your best option.
Really, though, you’d want to get something where you can see behind you – a good bit behind you. If you’ve ever been interviewed by me and Isaiah, you know that you’re usually a good distance from the wall behind you, so that the background is visible, interesting, but not distracting.
Let’s look at an example from a YouTuber:
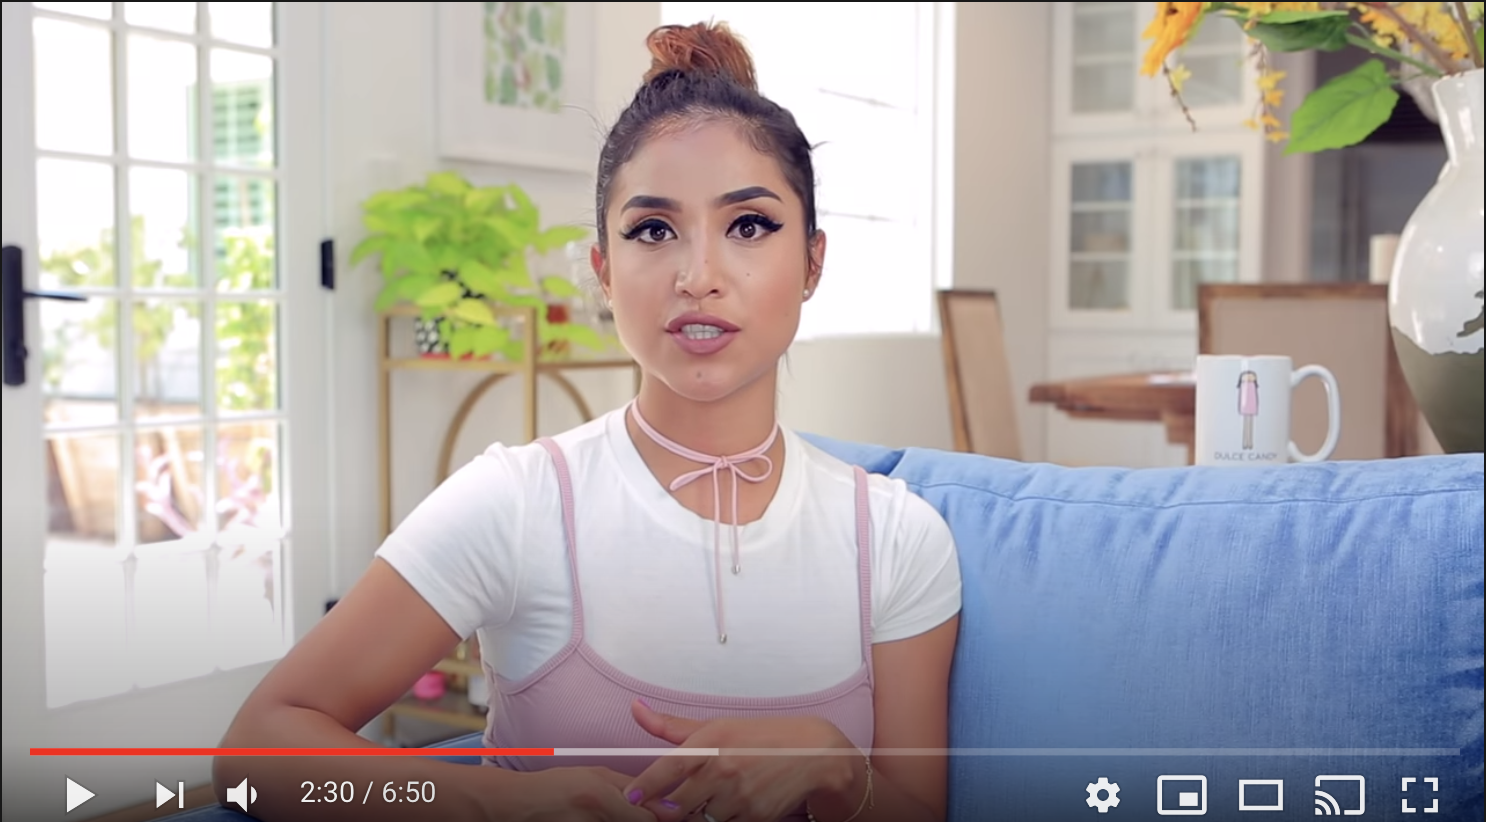
This is excellent because it gives a sense of the room and the space behind her. The walls are at an angle. There are windows giving light to the room, which is fine because she’s got enough light on her face to compete with them. So the image looks good all over.
Of course, that bring us to:
Lighting
Studio lighting is based off a concept of what’s called 3-point lighting, which looks like this.
We don’t have time for any of that. Let’s talk instead about ONE-point lighting: a single light, and what we can do with it.
A lot of you now have ring lights, which send off a soft, even glow onto your face. They aren’t very powerful, but your camera will be pretty close to your face, so the light can be right there.
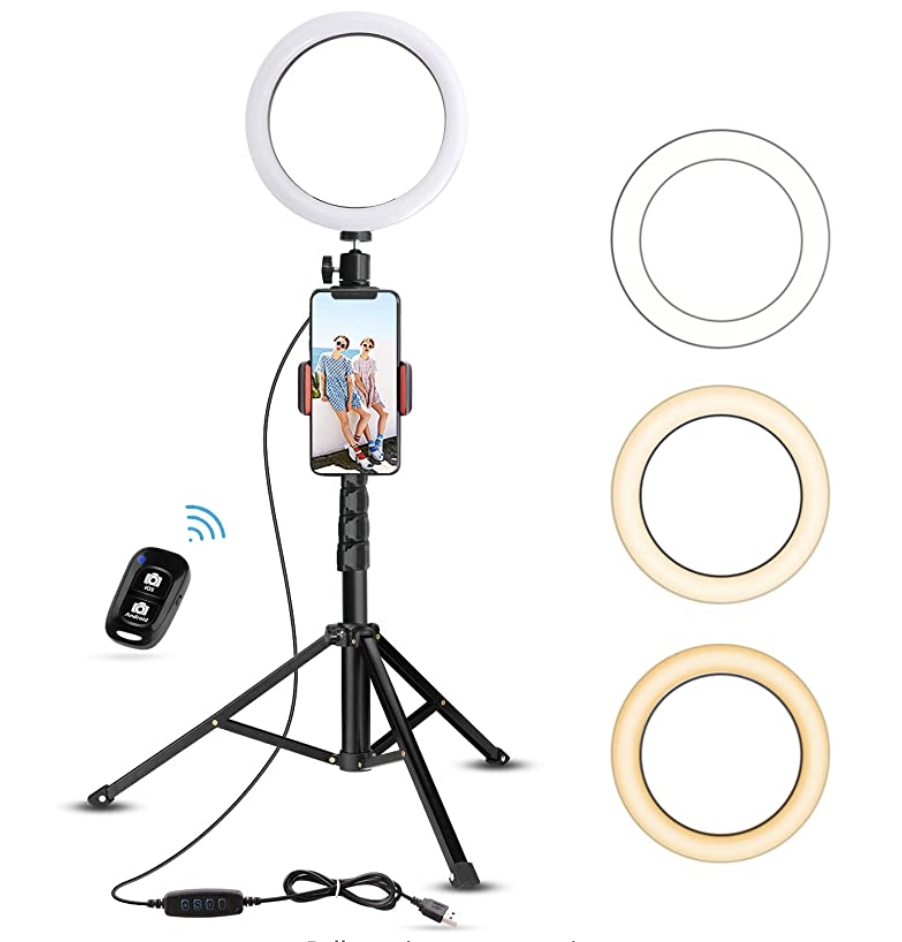
Your ring light has three settings: Cool White (the white setting that’s there when you turn your light on) Day Light (the blue light) and Warm Light (the yellow light). You can also control the brightness.
Mostly, you’ll just use the Cool White setting, which should work for most options. If you have a window anywhere in the background of your shot, or your room is lit by daylight from a window that we can’t see, switch to the blue setting. If your room is dark other than being lit by lamps, you probably want to switch to the yellow light.
The idea with this light – or any light that you use to light yourself – is that you want to put soft, disperse light, aimed at your face from just above head height. That will eliminate harshness, shadowy eyes, and a host of other things.
There are a host of ways to create this without using a ring light. If you’re using a window to light your face, make sure there’s some sort of cloth – anything from those white, gauzy curtains many windows have to a bedsheet tacked up over the window – making that light look gentle on your face. If you’re using a lamp or a store bought light on your face, make sure to put something in front of it so that the light that hits your face is gentle.
Ideally, you want to have a natural balance between the background and your face. If the image behind you is too bright, try getting more light on your face. If the image behind you is too dark, dim the light on your face, or turn on more lamps/let in more daylight to counter this.
You can do this. I have faith in you.
Text me if you have any questions. I don’t mind FaceTiming with you to look at a set up and make sure that everything is working the way it needs to.